UCanCode
Software focuses on general application software development. We provide complete solution for developers. No matter you want to develop a simple database
workflow application, or an large flow/diagram based system, our product will provide a complete solution for you. Our product had been used by hundreds of top companies around the world!
"100% source code provided! Free you from not daring to use components because of unable to master the key technology of components!"
|
|
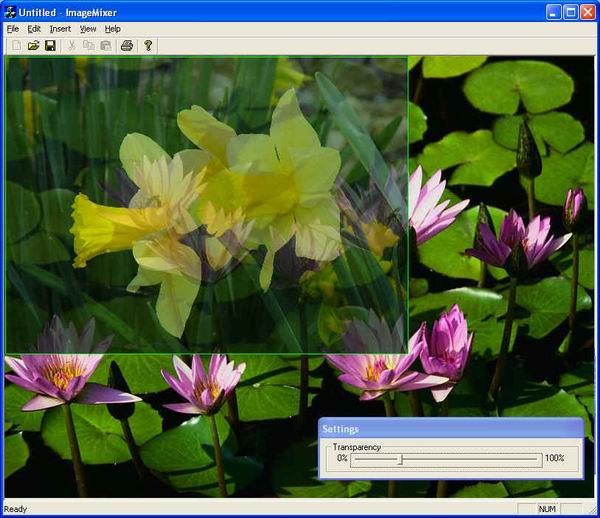
Draw transparency image file,
Alpha Blending using GDI+ Sample
|
| |
[Using the
demo
project, you
can insert
any image
and control
the
transparency
of the
image,
and you can
even save
the final
image as a
different
file. You
can also
select a
base image
to serve as
the
background
image
over which
you can
insert
images. But
you cannot
control the
transparency
of the base
image.
For
selecting
the base
image,
choose
File->Open
Base
Image
menu and
select the
desired
image.
For
inserting
the
image,
choose
Insert->Image
menu item
and select
the
image.]
Introduction
Alpha
blending
allows two
objects to
be visually
blended
together.
This is
primarily
used for 3D
atmospheric
and
environmental
effects. It
allows such
things as
"fogging",
where an
image
is rendered
behind
another
translucent
image, which
creates the
effect of
looking
though fog
or looking
down through
a pool and
seeing the
bottom. It
also allows
Depth
Cueing,
which is the
lowering of
the
intensity of
lighting to
make an
object
appear
farther
away.
In computer
graphics,
each pixel
has three
channels of
color
information--red,
green, and
blue--and
sometimes a
fourth
called the
alpha
channel.
This fourth
channel
controls the
way in which
other
graphics
information
is
displayed,
such as
levels of
transparency
or opacity.
Alpha
blending
is the name
for this
type of
control, and
it's used to
simulate
effects such
as placing a
piece of
glass in
front of an
object so
that the
object is
completely
visible
behind the
glass,
un-viewable,
or something
in between.
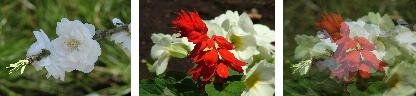
Figure1:
Alpha
blending
process
Alpha
blending
can be done
in per pixel
basis or for
the entire
image.
In per pixel
basis
alpha
blending,
each pixel
should
contain the
alpha
component
and the
transparency
of each
pixel is
controlled
by this
value. When
we do
alpha
blending
for the
entire
image,
the same
alpha
component
will be used
for the
entire
image
and hence
the
transparency
of all
pixels in
the image
will be the
same.
Alpha
blending
using
GDI+
Step 1:
Loading
the desired
images
We can
easily
construct an
image
object from
an
image file
using the
powerful
Image
class
provided by
GDI+,
as shown
below:
 Collapse
 Copy
Code
Copy
Code
Image img1("Flower1.jpg");
Image img2("Flower2.jpg");
The
Graphics
class in
GDI+
contains
several
methods you
can use to
create basic
graphics
like drawing
rectangles,
filling
regions, and
so on. But
to apply
alpha
blend
on
images,
you need
more
control. For
this, you
will have to
use the
ImageAttributes
class and
the
ColorMatrix
structure.
An
ImageAttributes
object lets
you control
the way
graphics is
rendered by
letting you
specify
different
settings
like color
adjustment,
grayscale
adjustment
and more.
The
ColorMatrix
is a
structure
whose
instances
are
parameters
in most of
the methods
of the
ImageAttributes
class. It
contains
values
specifying
the Alpha,
Red, Green
and Blue
channels.
So, the
next step is
to
initialize a
color matrix
object and
pass it to
the
appropriate
method of an
ImageAttributes
object.
Step 2:
Creating the
ImageAttributes
and
ColorMatrix
objects
A color
matrix is a
matrix that
contains
values for
channels.
It's a 5x5
matrix which
represents
values for
the Red,
Green, Blue,
Alpha
channels and
another
element w,
in that
order
(RGBAw).
In a
ColorMatrix
object, the
diagonal
elements of
the matrix
define the
channel
values viz.
(0,0),
(1,1),
(2,2),
(3,3), and
(4,4), in
the order as
specified
before -
RGBAw. The
values are
of type
float,
and range
from 0 to 1.
The element
w (at (4,4)
) is always
1.
What you
have to do
is to create
a new
ColorMatrix
instance
with the
desired
channel
values. As
we want to
control the
alpha blend
channel, we
should set
the element
at (3,3) to
the desired
value as
shown below:
Collapse
Copy
Code
ColorMatrix ClrMatrix =         {
            1.0f, 0.0f, 0.0f, 0.0f, 0.0f,
            0.0f, 1.0f, 0.0f, 0.0f, 0.0f,
            0.0f, 0.0f, 1.0f, 0.0f, 0.0f,
            0.0f, 0.0f, 0.0f, 0.5f, 0.0f,
            0.0f, 0.0f, 0.0f, 0.0f, 1.0f
};
The
0.5f
value in the
above code
represents
the alpha
blend value.
0.5 means
semi
transparent
(50%).
Once you
initialize
the
ColorMatrix,
you create a
new
ImageAttributes
object and
assign the
newly
created
ColorMatrix
to it. This
is done by
calling the
SetColorMatrix
method on
the
ImageAttributes
object. For
example, the
following
code creates
a new
ImageAttributes
object and
sets its
color matrix
to the one
just
created:
Collapse
Copy
Code
ImageAttributes ImgAttr;

ImgAttr.SetColorMatrix(&ClrMatrix, ColorMatrixFlagsDefault,
                        ColorAdjustTypeBitmap);
The final
step is to
draw the
original
image with
the
ImageAttributes
object just
created.
Using this,
ImageAttributes
object would
draw the
original
image with
the alpha
value we set
in the color
matrix,
creating the
alpha image.
Step 3:
Alpha
blending
the
images
As we
need to
blend
img2
over
img1,
first we
should draw
img1 on the
desired
Graphics
using the
simplest
overloads of
the
Graphics.DrawImage
method, as
shown below:
Collapse
Copy
Code
g.DrawImage(&img1, 0,0,img1.Width,img1.Height);
To alpha
blend image
img2
on
img1,
we call one
of the
overloads of
the
Graphics.DrawImage
method on
the
Graphics
object which
accepts an
ImageAttributes
object with
which we
would
specify the
render
modifications.
For example,
the
following
code draws
the image
img2
at the
location
specified,
with the
ImageAttributes
object
ImgAttr
on a
Graphics
object
g.
Collapse
Copy
Code
g.DrawImage(&img2, RectF destination(0,0, img2.Width,img2.Height), 0,0,
                  img2.Width,img2.Height,UnitPixel,&ImgAttr);
Now the
resultant
image on the
Graphics
object
represents
the alpha
blended
result of
Img2
over
Img1.
(The
Graphics
object can
be any
graphics
object which
may be
obtained
from a
control,
created from
image etc..)
|
|
|
|
|
|